Does Growing Your Own Food Save Money? I Tracked Every Dollar
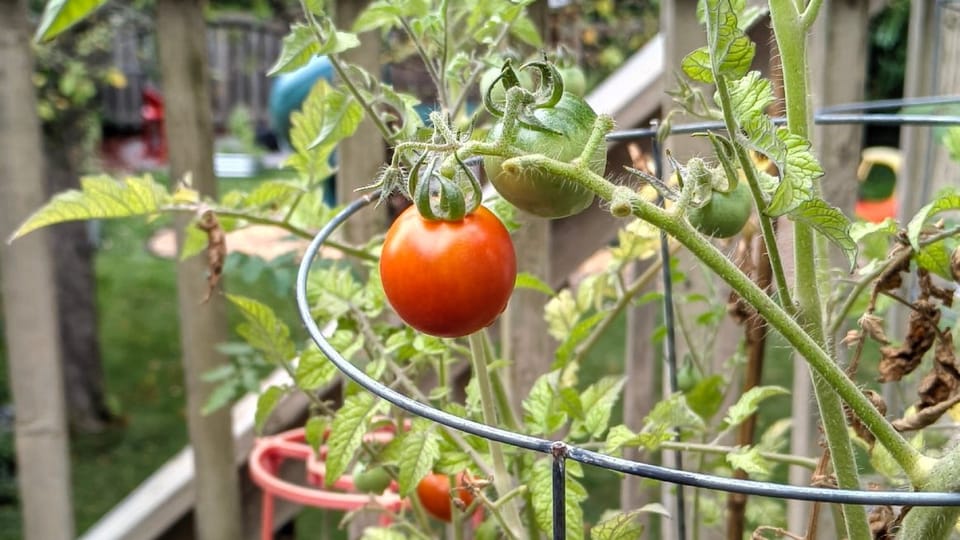
I'll save you the long read - no, you can't save money growing your own food. At least not in the first year. But eventually, you probably can.
This summer I ran a little experiment in our backyard. I tracked every dollar I spent on pots, soil and seeds, and every herb, tomato and radish we picked and actually ate. Below are the real numbers, what went wrong, and how long it might take to break even.
We'll cover how it started, what I spent, what we harvested, the math, the stuff the math doesn't capture, and what I'll do differently next year.
What's not included in my numbers
Before we start, two things I'm leaving out.
The previous owners of our home had already built a few raised beds in the backyard. I'm not counting their cost because I didn't pay for them (at least not directly), and as you'll see below, they didn't produce anything anyway.
I also got an indoor seed starter kit for free about 12 years ago because the self-watering mechanism was missing. That isn't counted either.
You don't need the starter kit or the raised beds to do this. All the yields below come only from the new pots I bought.
How it started
It all starts with a plan, which I did not have. Five years after moving into our home, I finally started organizing our garage. The long-term goal is to finish it properly, with drywall and paint. While digging through boxes, I found that free seed starter kit I had completely forgotten about.
Back when I got it, we lived in a tiny condo with no room for it, so it went into a black garbage bag and down to our storage locker. It sat there for 7 years, then another 5 years in a dark garage. I was honestly surprised the grow lights still worked.
You know what else was in that garbage bag? A 12-year-old pack of cherry tomato seeds.
Now that we have room indoors and a big backyard, I was curious whether I could grow anything from this "free" find. I bought a bag of seed-starting mix, filled the trays, set the kit up in the basement, turned on the lights and started the experiment. To improve the odds, I also bought a couple of fresh packs of cherry tomato seeds and a few other seeds for outside.
For the curious - the 12-year-old pack produced tomatoes but very few.
Starting seeds indoors (and my first mistake)
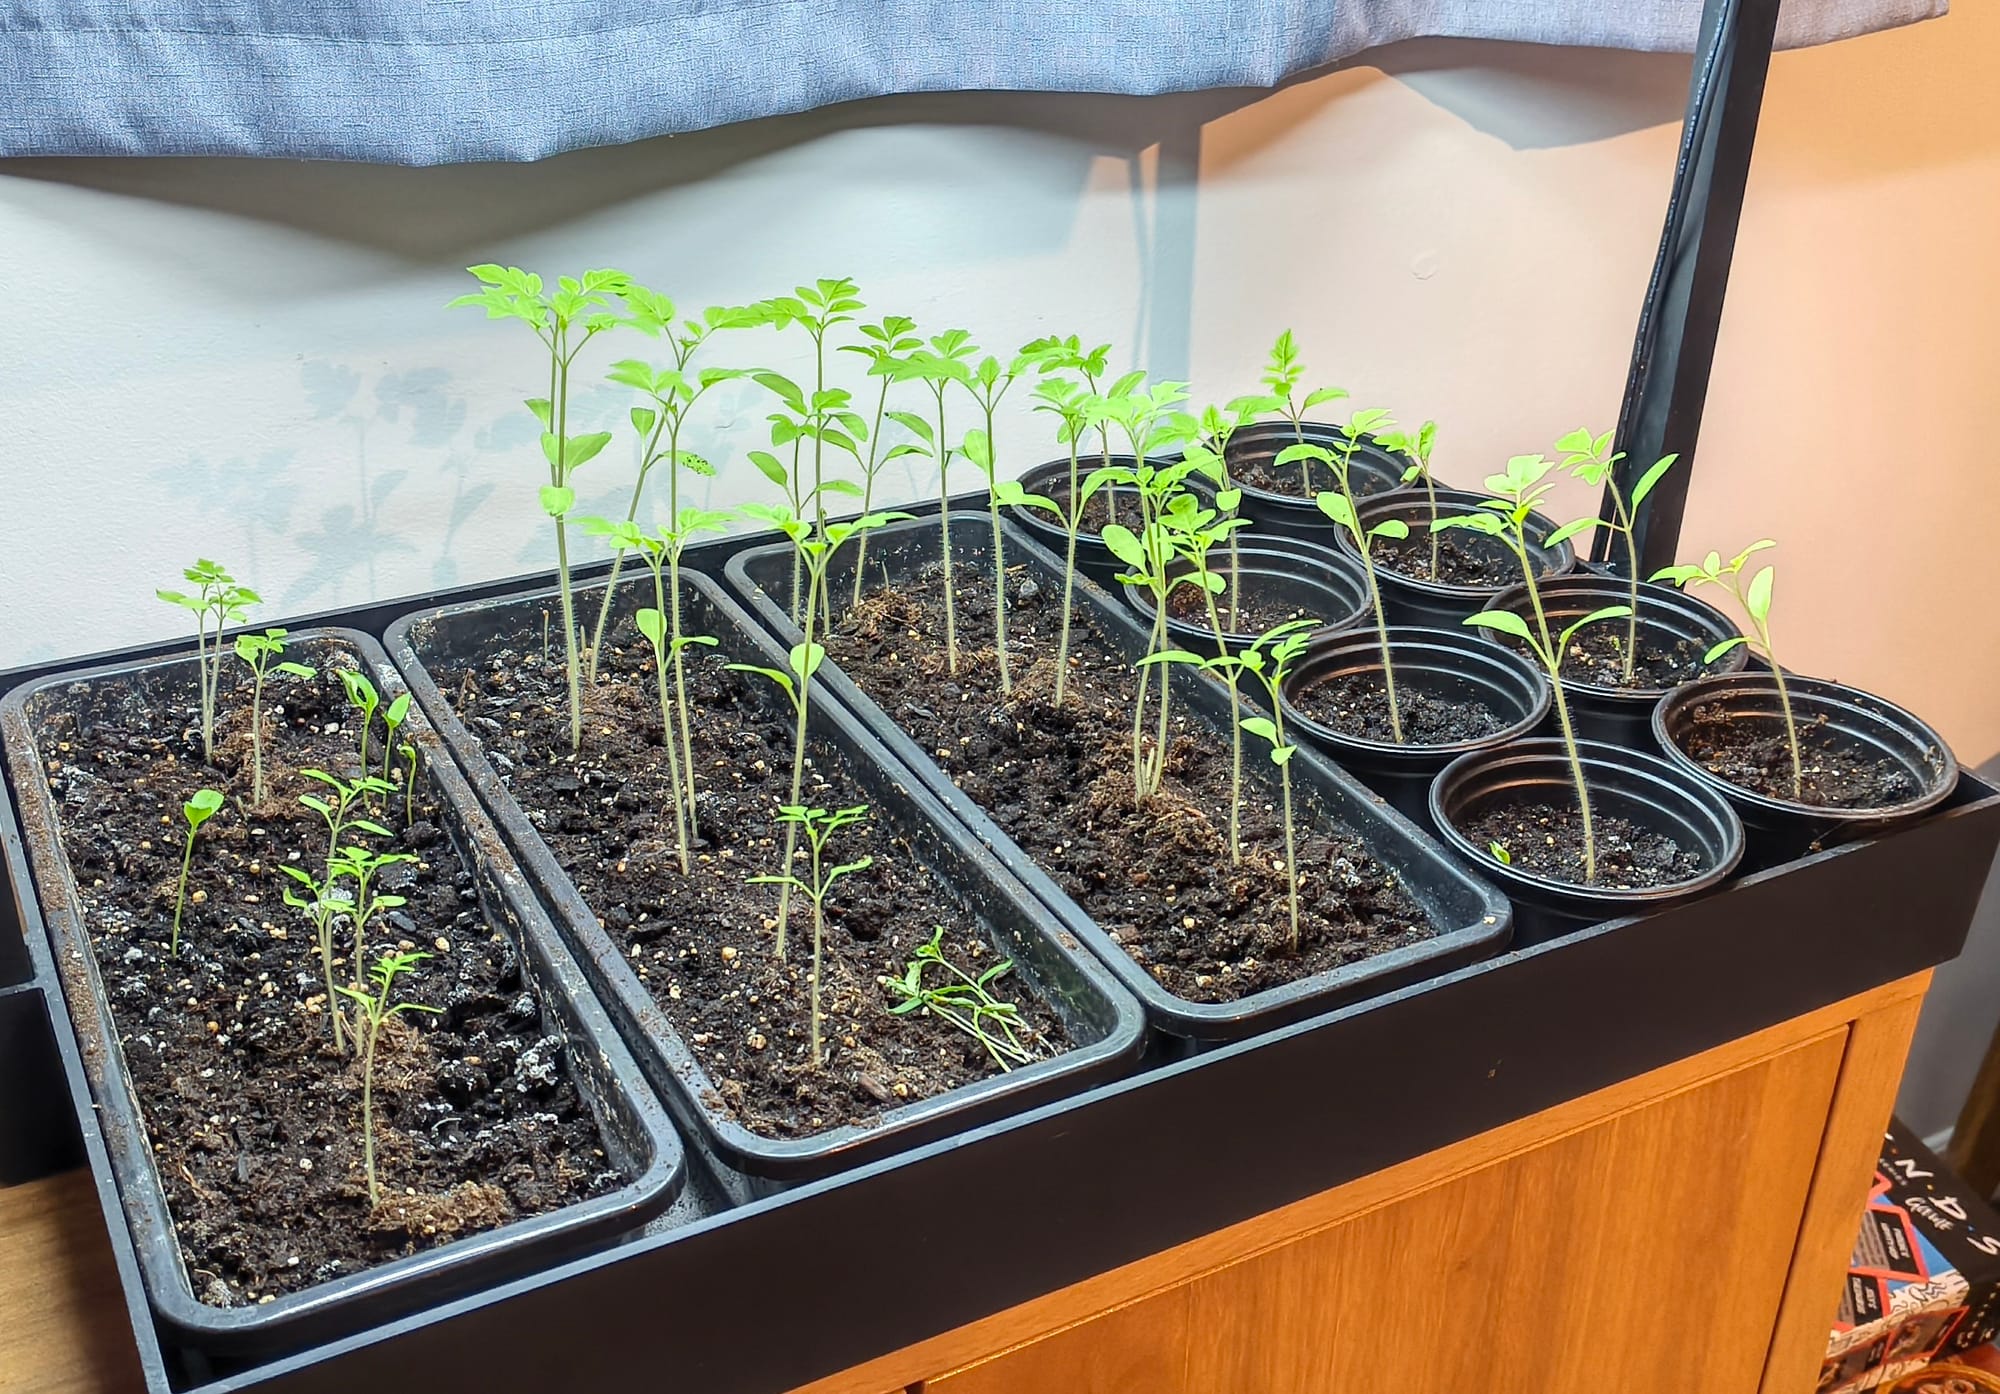
Just look at it! The seedlings came out tall, thin and floppy. Gardeners call this "leggy." I assumed it was because I left the lights on too long, about 12 to 13 hours a day. After some reading, it turns out I had it backwards. Most seed-starting guides recommend 14 to 16 hours of light a day. Leggy seedlings usually mean the light is too weak or too far away, so the plants stretch to reach it. A warm room can make it worse.
I also should have moved them into bigger containers sooner. Oh well. First-year experiment, zero reading beforehand.
Moving outside (and feeding the local wildlife)
I planted the biggest seedlings in the raised beds that were already in the backyard. The next day, they were gone. Not chewed, not knocked over. Just gone. We lost 16 seedlings this way, to animals I presume.
That's when the costs started to add up. Instead of trying to protect the beds with a cage or netting, which would also cost money and sounded complicated, I bought large canvas pots and put them on the deck, where fewer animals wander.
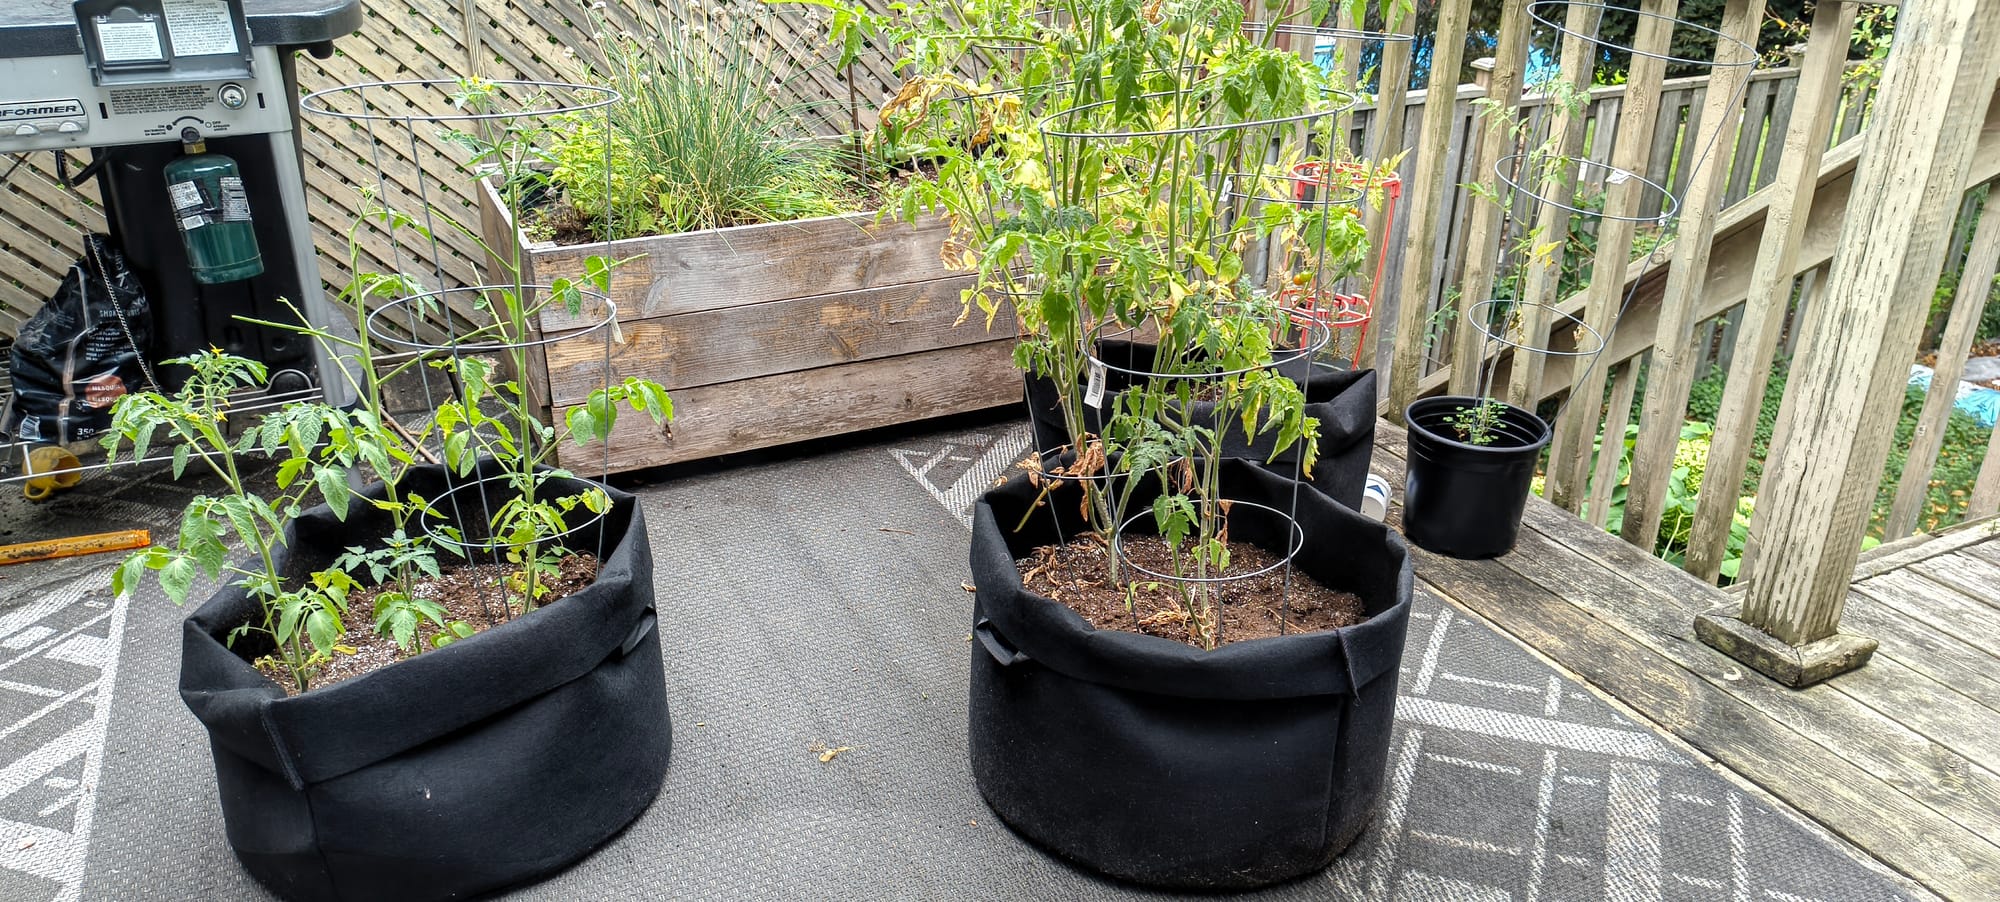
I went with 20-gallon pots because reviewers said they could fit 3 tomato plants without any issues. That turned out to be true. What the reviewers didn't mention is how much soil it takes to fill one. A 20-gallon pot holds roughly 76 litres, or about 2.7 cubic feet. Ten of them full would take around 27 cubic feet of soil.
To save some money, I only filled mine about three-quarters of the way. I'll top them up next year.
What I spent
Here's everything I bought. All prices are in Canadian dollars, and many items were bought on sale, so the prices on the product pages may not match.
Here's what I used. I'm not affiliated with any of these companies, so clicking the links doesn't earn me anything.
- Seed-starting mix
- Potting soil for the big pots
- Canvas pots
- Tomato cages (I also tried a 3D printed one but I used more material than buying from a store)
- Seeds: other than the ones from the garage, I grabbed these from the seed carousel near the checkout at our local grocery store. I have no links to share but you have all seen those packets.
What we harvested
The biggest win was always having fresh herbs on hand. When I buy herbs, I buy a small bunch for one specific dish. I use what I need, and the rest sits at the back of the fridge until it goes bad a week later. This summer, I didn't buy a single pack of herbs.
That said, I didn't count "never buying herbs" as savings. Instead, I tracked how much I picked each time and only counted a "pack" once my total reached the amount you'd get in a store pack. Sometimes I went two weeks between picking. If I'd been buying herbs over those two weeks, I probably would have bought 3 or 4 packs. So the real savings are likely higher than what's in this table. The costs are based on the cheapest comparable products sold at our local grocery store that we go to on a regular basis. Your costs may vary so take that into account.
The table only includes what we picked and ate.
The math - year one
So in year one, our garden cost us about $144 more than it saved. For every dollar I put in, I got about 28 cents of food back.
That's not great. But almost all of the spending was on things I will reuse.
What the numbers don't show
1. No more wasted herbs. As I mentioned above, the herb savings are counted conservatively. Not throwing out half a pack of slimy basil every week is a real saving that's hard to put in a table.
2. The squirrels got a cut. By late summer, the squirrels found the tomatoes on the deck. Every time I picked tomatoes, there was another 10% to 30% of that amount lying half-eaten on the ground. If we had kept those, the tomatoes alone would have been worth about $30 to $36 instead of $27.64.
3. Some plants come back for free. Chives are a perennial and usually survive Ontario winters outdoors, so next year's chives should cost nothing. Rosemary won't survive our winters outside, but it can be brought indoors and kept going. I just need to remember to do this before the cold kills the plants.
4. Costs I didn't count. I didn't include the electricity for the grow lights. My kit uses 48 watts. As a rough example, the 48-watt light running about 12 hours a day for a month uses around 17 kWh, which is only around $3 dollars at my local rates. I also didn't count water or my time. Water was minor. My time was a hobby, so I'm calling it free.
When will I break even?
The big one-time costs, the pots, the cages and most of the soil, are done. From here on, the main costs are seeds, compost or fertilizer, and topping up the soil once.
Here's my rough estimate for the next few years:
- Year 2: top up the soil ($30), seeds and seedlings ($20), compost/fertilizer ($10) = about $60
- Year 3 and on: seeds and compost/fertilizer only = about $30 a year
The question is how much we harvest. Here's what happens to the running total (starting at -$144) under three scenarios:
If the harvest stays exactly the same, year 2 is basically a wash, and it would take about 8 years to earn back the setup cost. If I can double the harvest by keeping more plants alive, using more of the space I already have, and sharing less with the squirrels, the garden pays for itself in year 4. That's very doable.
What I'll do differently next year
1. Better light, not less light. I'll put the lights on a timer for 14 to 16 hours a day and keep them just a few inches above the seedlings, raising them as the plants grow. A small fan for a couple of hours a day also helps the stems get stronger. And I do have a USB fan from an old computer build so no extra cost there.
2. Harden off the seedlings. Instead of going straight from the basement to the garden, I'll put them outside for a few hours a day for a week or so before planting them for good.
3. Use the raised beds I already have. They're free growing space. A simple cage made of hardware cloth or a layer of netting over the beds is cheaper than buying more pots, and it would roughly double my growing area. I can also transfer some of the soil from the raised beds over to my canvas pots on my deck and reduce the year 2 costs.
4. Pick tomatoes early. Once tomatoes start turning colour, I'll pick them and let them finish ripening on the counter. That should leave less for the squirrels to steal. In fact, this is what I had to do at the end of the season when temperatures started dropping. I have a bunch of tomatoes sitting in a brown paper bag with a banana in it.
5. Grow what's expensive to buy. Herbs and cherry tomatoes gave us the most value. Radishes earned $2.95 for a whole season of pot space. They're fun and fast, but they're cheap at the store. Next year, that space goes to more herbs and tomatoes.
Should you grow your own food to save money?
A quick gut check:
- Probably yes if you already have pots, beds or soil, you cook with fresh herbs often and keep throwing out half-used packs, you have a sunny spot, and you'd enjoy it anyway.
- Maybe not if you're starting from zero and only care about saving money this year, you don't have much sun, or you have a lot of hungry wildlife and no plan to keep it out.
If you go in treating it as a hobby that slowly pays you back, you'll probably be happy. If you go in expecting to cut your grocery bill in the first summer, you'll probably be disappointed…unless you have lots of time and can constantly tend to plants, and love hunting for used pots, cheap soil and things you need.
The next experiment - winter herbs
This winter, I'm going to try growing herbs indoors in the seed starter kit. The only thing I need to buy is seeds. My plan is to try basil, parsley and cilantro, which are the herbs I buy and waste the most.
From what I've read so far, basil likes warmth and lots of light, parsley is slow to sprout, and cilantro tends to go to seed quickly, so it's best to keep cutting it and sow a few seeds every few weeks. I'll report back on how it goes and whether it's worth it.
The takeaway
Year one of our garden cost $199.52 and gave us $55.49 worth of food, for a loss of about $144. Most of that money went into pots and soil that I'll use for years, so the real question isn't whether it saves money this year. It's whether I can grow enough to make up for it.
Based on my numbers, a garden can pay for itself, but only if the harvest grows. Start small, use what you already have, grow the things that are expensive to buy, and protect what you plant.
Prices are what I paid in spring and summer 2026, often on sale. Store prices are from my local grocery store at the time. Your numbers will vary by region, store, and how hungry your squirrels are.
